What Is The Difference Between Reverb, Echo and Delay?
Sometimes when Musicians HQ mentions gear, we’ll include our affiliate link & may earn a commission at no cost to you. This doesn’t impact the products we mention.
If you go into a large hall, an amphitheater or even a forest and shout or sing, the sound that you hear will bounce of the high number of surfaces and you will hear ‘reverberation’. As these sounds gradually get absorbed by these surfaces the sound decays and gradually fades away. This is a natural reverb.
Reverb is with us wherever we go, it is just more pronounced in certain places. Any space that is large enough and has multiple surfaces to absorb sound will have reverb. Pay attention next time you are in a hall and start talking.

This differs from natural echo which occurs in simpler spaces with less surfaces to absorb the sound. This might be a tunnel or small empty room. Without all the different surfaces to absorb the sounds at different times the sound waves simply bounce back and forth in a ping-pong fashion.

It is that difference in time between when sounds are heard that is the real difference between echo and reverb. You will not be able to detect the gap between reflections for reverb as it is 50ms or lower (that’s very fast). Whereas for echo the gap between reflection is higher, typically between 50 to 100ms and you will be able to here a small gap between each sound.
This lead to many great concert hall spaces being designed very carefully to achieve the most pleasing reverb sound. Sonically pleasing as the soundwaves gradually decay.
This is the sound we are craving when we add reverb effects to our music. We want that texture and warmth that can really take a sound from sounding a bit dull and lifeless to sounding full and alive.
Delay is basically a form of echo, i.e the note played echoes back. However, delay effects add a lot of flexibility to an echo. So you can use settings to change the volume and time of the repeated notes (more on that later).
More details on reverb
What is reverberation time?
When you sing in that great hall with amazing reverb, the amount of time it takes from when you sing the note, to when it has completely faded away is known as the reverberation time. The decay time is also sometimes referred to as the reverbs ‘tail’, with a longer tail fading to silence more slowly.
How is reverb created artificially?
Musicians wanted to recreate that effect of being in a large hall wherever they were, whether it was in a small studio or at a gig in a bar. But recreating reverb proved quite tricky.
At first, the only way to add reverb to a recording was to play a recording of a sound through a loudspeaker located in a large hall and then record the result through a microphone.
Plate Reverb
This was the case until the invention of ‘plate reverb’, which can still be found today. Plate reverb works by taking two transducers and suspending a large plate of metal in between them. The first transducer creates a sound which bounces across the sheet of metal where it is then picked up by the second transducer.
These plates are extremely sensitive to picking up any sound that occurs and so usually have to be in an isolated room to prevent interference.
Plate reverb tail length could be altered by stretching the plate tighter with dampening pads being placed near to the plate (but not touching) to reduce the tail length.
As you probably guessed these units are not cheap and being so delicate and large were not suitable for transporting around regularly and certainly not for use in live concerts.
This lead to the invention of the spring reverb.
Spring Reverb

Spring reverb works in a similar way but uses springs rather than metal plates. An electronic signal (rather than audio signal) is played through the metal springs causing them to vibrate.
When placed into an amp this vibration causes any sound played to be affected and creates reverb.
Patented in 1939 the spring reverb found its way into many older guitar amps due to it being relatively cheap to make. It was also built into the Hammond Organ.
Due to the way they create the reverb, spring reverb works better for certain types of sound and less well for others. A constant strumming of a guitar or the notes on an organ work ok. But if you play a sound through an amp with spring reverb that has sharp loud transients, like a drum for example. The spring reverb really doesn’t work and you will get a weird pinging sound.
Digital Reverb
What a time it is to be alive now. I find myself in virtually every article I write around home recording now saying “luckily for you there are now digital versions of this which will save you time and money”. Reverb is no different. No longer do you have to take a microphone into a giant hall or suspend a giant plate, you can use computer algorithms instead.
These algorithms simply take your sound and repeat it a high number of times very quickly whilst slowly making the sound decay. This has become so advanced now that you can pick the exact type of room you want your reverb to mimic. A hallway perhaps? No problem! What about an abandoned church? There’s a reverb for that too.
Some reverb techniques
Early Reflections
Without going into too much detail here, early reflection reverb refers to the sounds which reach the listener first, perhaps after just bouncing off one or two surfaces. These sounds arrive after the direct sound but only just (<100 milliseconds usually). These reflections are what the listener’s brain uses to calculate the size of room. So if you close your eyes the early reflections will allow you to tell if you are in a hall or a small room.
Early reflections are used to add depth to a sound as it is those first few reflections that create the impression of room size. So altering the time of the early reflections can be used to push the sound back in the mix and make it less in your face.
Gated Reverb
Gated reverb is a reverb technique that was apparently created accidentally by Phil Collins in the 1980s (when a microphone used by the sound engineers to talk to the band picked up the snare drum sound). It subsequently became an iconic technique of that era.
A gated reverb applies a gate to the sound to reverb to limit the number of natural reverberations, effectively cutting the sound off before it has a chance to naturally decay to silence. It creates a very artificial but very huge sound on a snare drum.
What is delay?
Delay is basically the same as echo but can come in different forms. A note is played and the same note is then played back.
Delay is produced by taking a recording of the initial sound and then playing it back.
Rather than with an echo or reverb which are played and then decay gradually to silence, delay can be manipulated through various settings to do all sorts of things and doesn’t need to decay at all, in theory a delay effect could keep playing a song indefinitely if the settings are set in the right way.
How is delay created?
Tape loop delay
Delay was original produced using tape loops. A recording would be made onto a tape and then the sound was passed through multiple different ‘playback heads’. Distance between the heads and the speed of the tape changed the type of delay. This sound of a tape is still something that some producers crave today and several plugins and emulators try and recreate the unique sound of a tape delay.
Bucket-Brigade Device
The technology advanced in the 1960s with the invention of the Bucket Brigade Device which slowed down an audio signal passing though it. Two signals would pass through the device, one without being slowed down and one being slowed down. These two signals would join back but would not be out of sync with one another creating a delay effect.
Digital delay
As with reverb everything changed in the digital age. Now that computer algorithms could be used along with much larger memory capacities, sounds could be recorded and manipulated faster and in more ways than ever. This lead to some weird and wonderful different types of delay:
Types of delay
Slapback
Slapback delay is the fastest and punchiest form of delay effect. It is closest to a classic natural echo. The fast echo effect creates the feeling of the instrument or vocals sounding ‘bigger’. Very common in musical styles such as blues.
Doubling
Doubling delay has a shorter delay time than slapback delay. So rather than your classic echo, the equivalent of shouting in a large room and waiting for the echoes to bounce back. Imagine shouting but then hearing the sound back immediately, as if it knew what you were going to say.
This is why the effect is called doubling as it doubles up each sound.
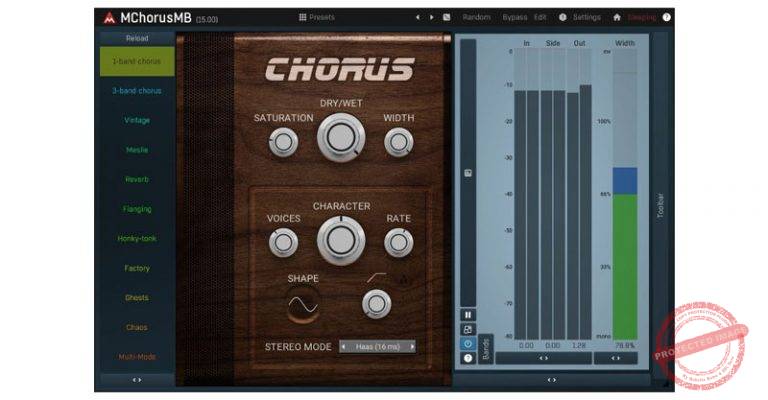
Chorus
Chorus delay mimics the sound of a chorus. Chorus delay is fast like doubling delay but a small amount of modulation is added which causes some subtle variation in the tone.
Long Delay
A long delay leaves an audible gap between when you play a note and when you hear it repeated back. This could be as much as a few seconds
Ping-Pong
As the name may suggest. Ping pong delay makes the sound ping-pong from left to right across the stereo field.
Delay controls
Below is a brief summary of some of the controls you are likely to see either on a delay pedal or on a delay plugin in your DAW software. The names of these do vary and you may not find them all on each pedal or plugin.
Type
If you have a multi-functional delay pedal you may be able to choose the delay type. That will probably be from the list above but some pedals can have to wacky delay settings, so if the delay type isn’t listed here you may have to dig out the instruction manual.
Delay Time
Often displayed in milliseconds the delay time is usually the amount of time between when the note is played and when the repeated note sounds. On a pedal, you are not going to be able to dial in an exact delay time so you just use this as a rough guide. On some delay pedals to get around this you can select a delay time ‘range’ so you have a rough idea what the delay time will be within a certain range but it won’t be exact.
However, for a digital delay plugin, you can often program the delay time very precise amounts as the exact time in milliseconds will be displayed.
Feedback/ Repeats
The feedback setting will control the number of times the note repeats. If you have the feedback dialled all the way down you may only hear the note repeated once.
Level
The level setting controls the volume of the repeated notes. So if you have this dial turned all the way down the repeated notes will barely be audible, whereas if you have it turned up the notes will repeat at the same level as the note you just played.
Mix
With effects, you will often see a signal labelled as ‘dry and ‘wet’. Quite worrying words to be using around electronic equipment.
These words are used to describe the amount of the effect that is applied to your original sound. The ‘dry’ signal is the original unaltered sound. So if you have the knob set to 0 or 100% dry then you will hear non of the delay effect. But when you turn the dial up, you will add the percentage of ‘wet’ signal. The wet signal is the sound with the delay applied to it.
So you can mix the dry sound and wet sound together by a different amount to affect how extreme the delay effect sounds.
Some more classic delay tricks
Dotted-Eighth Delay
This is the delay trick probably most well-known for it’s use by The Edge, the guitarist from the band U2 (see video below for what I mean). This type of delay very precisely programmes the delayed note to occur on the last 1/16th note of a beat.
All you then have to do is play 1/8th notes and the delay effect will create the illusion of faster scales being played.
If you want to calculate the delay time for this based on the beats per minute of your song use the formula:
240,000/BPM * 3 / 16
So for a song at 120 BPM you get 240,000/120 * 3 / 16 which gives 375m/s. So that is the delay time you want to set for dotted-eighth note delay.
When Should I use Reverb, Echo or Delay?
So now you know the difference between reverb echo and delay how do you know when to use which one?
There is no ‘correct’ answer to this question as it depends on the genre of music, the feel you want to create and the interaction between the instruments in the mix.
It is also commonplace to use the effects in combination with one another and so it isn’t necessarily a case of choosing one or the other.
Vocals
Recording dry
You can record vocals in a room with natural reverb or echo to create the effects, i.e go into a church to record loads of reverb. But this more traditional method is not usually favoured in the modern day recording process, and let’s be honest, as musicians in the home studio we are unlikely to be able to record in a church whenever we want to lay down a vocal track…
So instead you are best off recording a ‘dry’ vocal. One without any reverb, delay or echo and then applying the effects after in the mixing process. This is handy as most of us are recording vocals in a small room such as a bedroom which probably has soft furnishings and carpets so the amount of natural reverb is going to be very low. Doing it this way allows a lot more control and you can really get the exact amount of effect for each track just right.
With all the techniques of adding effects below, I recommend creating separate tracks (i.e a reverb track) and then sending the vocals/ drums/other instruments through that track. That will allow you to adjust the level of the effect and will also save a lot of computing power because you can send multiple tracks through the same reverb channel.
Reverb on vocals
Back in the 90s, many vocal tracks used to have a lot of reverb treatment in an attempt to make them sound ‘huge’. This trend has calmed down slightly in recent years and people tend to mix with slightly more subtle reverb on vocals now.
A problem with adding huge amounts of big room reverb onto a lead vocal is that it can make them sound quite distant. This can sound really cool and may be what you are looking for in certain genres. But in many cases you want the lead vocals to shine through and stand out as the main focal point of the track, in which case too much reverb may hinder that.
Many reverb plugins will come with presets that you can experiment with to get an idea of what sounds good. These will often describe the type of room the sound is trying to mimic, i.e ‘hall’, ‘church’ or ‘room’.
As with anything in music production you can stick a preset on or a stock plugin within the DAW which is a start. But there is really no limit to the tricks and techniques out there for you to experiment with on your vocal tracks. Either tweak the plugin yourself or head to youtube for lots of in-depth videos on how to add different types of reverb to vocal tracks (it can get pretty advanced, pretty quickly).
One trick I will mention is I pretty much always put a low pass-filter on a vocal reverb. If you don’t eliminate the very highest frequencies you will cant a lot of annoying sibilances (‘s’ sounds) coming through.
Delay on vocals
Reverb may feel like the obvious choice on vocals to create a feeling of space in the sound. But it can have its downsides. As I mentioned above if you are using it on a lead vocal it can start to become less prominent in the mix when playing with all the other tracks together. It can start to feel a bit lost.
Another downside is that with the time it takes for each delay time, the singer’s notes begin to overlap with one another. This can mean the track feels less energetic and doesn’t cut through as well as it could.
This is when using delay may be a better choice.
The best delay technique to get started with on vocals is a very fast delay with little feedback, i.e a ‘slapback delay’ as mentioned earlier in the article. Give this a go on a vocal track and compare it to reverb to see the difference. So load up a stock delay plugin and turn the feedback right down to 0 or close to 0 so you get a slapback. Then you can play around with the delay time to see what sounds good. Obviously, this delay time should be quite short (50-150ms usually) otherwise the track will start sounding very weird. But pushing the time higher particularly on slower tracks can sound pretty awesome.
Drums
With drums in the home studio, you are most likely going to be using programmed drums within your DAW. Some of these will have a bit of reverb on already but a lot of the time you may want to add some effects to create a bigger sound that fills more space.
Reverb on a drum kit
If you are looking to get a realistic sound to your drums you want it to feel like they were all recorded in the same room. To do this you want to send all your individual drum tracks, rather than the entire drum bus, through the same reverb return track. This will give you the same type of reverb on each drum.
The amount of effect on each drum doesn’t have to be the same and you can tweak that for each track. For example with the kick drum if you are too heavy on the reverb you will get some clicky, high end sounds coming through which you probably won’t desire. You want to keep the kick punchy.
Another trick to try out when applying reverb to the entire kit is to apply some EQ to the reverb. Add a high-pass filter onto the reverb and this will filter out some of the muddier low end and keep everything sounding nice and bright.
Using pre-delay on the snare
Of all the drums where you are likely to want to add some effects to bring it to life is the snare drum. When played in a live setting the snare is known for its reverberating sound but when using samples or recording at home in a small room you are unlikely to get this. That is when we look toward reverb.
But you have to be careful to use reverb in the right way. If you use too much it may get messy, you may lose the snappy sound you are after and it can also sound quite unrealistic. To get around this, most reverb plugins have a setting called ‘pre-delay’. A pre-delay creates a delay of the note and then sends the delayed note, rather than the original note, through the reverb, and this is all done in the same plugin so it doesn’t get too complicated. This trick gives the listener the sense of reverb and space to the snare but without it getting washed out in the mix.
Guitar
Using reverb on guitars
When it comes to adding reverb on guitars it really depends on the type of music you are trying to create. If you want to create something atmospheric then it can be a great tool, but for some genres such as heavy rock or metal, it is usually avoided as it tends to wash everything out.
So try applying some room reverb to guitar tracks if you want to create a more ambient sound but be careful not to add too much as it can start to get a bit messy. As with vocals, it depends how much you want your guitar to stand out or blend into the mix. Reverb can be a good way to ‘push-back’ the guitar if it is a little too dominant for example.
A spring reverb, commonly found in most amplifiers can be useful if you want to create a blues feel to the guitar. It is a classic sound that you will probably instantly recognise.
Reverb used in the right way can also sound amazing on lead guitar parts. A plate type reverb applied to a lead guitar track can really bring the sound to life without it sounding too washed out.
Something like brothers in arms by dire straights is a good example of how epic a bit of reverb can make a lead guitar parts sound:
Using delay on guitars
Dotted eighth delay – I already mentioned the classic ‘dotted-eighth’ delay probably made most famous by The Edge from U2. This can be great on plucked chords where simply playing a few simple notes can make it sound like you are a guitar genius. You can also use the dotted-eighth delay technique on rhythm guitar too. If you add a little modulation to the delay this technique can really add some width to a rhythm guitar part.
Delay on solos – Another common place to use delay on guitar parts is on solos. I really like the sound of a fast delay on a solo, but don’t feel like you have to use it on every single one! Some people get into the habit of sticking one on as an excuse for sloppy playing as it can mask the odd mistake. The use of delay helps a solo fit in much better in the mix when recording, without a subtle delay the solo can sound a bit too dominating. Use with caution, turn the feedback/ repeats down quite low so that it doesn’t get too messy, you probably only want 2 or 3 repeats of each note.
Reverse Delay – Another really cool technique to try on guitar parts is a reverse delay. Put simply the initial sound is recorded and played back but in reverse to create a very unusual but very cool sound.
Choosing your Reverb
Song Tempo
Each type of reverb brings with it a unique character. A small room reverb with giving you quite a predictable, linear reverb sound, whereas a large hall or church reverb will be more unpredictable. So with this in mind, the tempo of your song can play a part in which reverb you choose. If you are playing at a high temp, using an unpredictable large hall reverb will probably not work, but for slower tempo tracks these larger reverb sounds can be great. This also applies to the complexity of the track as well as tempo, if a guitar part is particularly complex, even at a slower tempo a large hall or church reverb may wash it out.
Instrument Tone
If you are looking to add some more harmonic qualities and interest to a track then maybe a plate reverb would be a good option. Plate reverbs have ‘resonant areas’ which give a unique quality when certain frequencies resonate more than others, this gives more of a unique feel that just a standard room or hall reverb. This can be used on something like a snare drum to make particularly desired frequencies resonate.
Paying attention to the tone of the sound is important when selecting a reverb. If the reverb is too similar to the original sound it won’t really make a difference to it (for example putting a bright reverb on a bright guitar track). It is good to use contrast when using reverb to make it stand out. Using a bright reverb on a warm vocal, for example, can bring it to life.
How dense is the mix?
When mixing with reverb you have to make sure all the instruments work together. There is only a certain amount of ‘space’ sonically in the mix of a track and so sticking loads of stereo reverb on every instrument can get crowded. On particularly busy tracks you may consider using mono reverbs instead of stereo so they are easier to distinguish in the mix.
Reverb Plugin or Reverb Pedal?
Whether you go for a DAW plugin or a pedal depends on your budget, setup, and needs.
In the home studio, I recommend starting with a good reverb plugin rather than a pedal for a number of reasons. Firstly it will probably cost you a lot less, even though you can pick up some cheap second-hand reverb pedals, even a really advanced plugin can be purchased for under $50. Secondly recording a dry guitar sound and adding effects after is likely to get better results when recording at home, trying to accurately capture a sound that already has a lot of reverb can be a tricky process.
However, that said, if you are a guitarist who is planning on using the pedal to play live then a pedal makes sense and you will want to try and find a tone you can use for recording and for gigging.

Plugins
In the home studio on a budget, you can get some pretty nice sounds just using the stock reverb plugin that will come with your DAW software. These effects tend to keep things fairly simple and are a nice place to start when you are getting to grips with how to use reverb correctly and how to use the different settings. Once you start to get more advanced you may want to purchase a slightly more complete plugin to expand your reverb capabilities.
There are some bad sounding reverbs out there for sure, these are ones that just don’t create the feel of a track that was recorded in a large room. Remember that is the key thing we are after with reverb.
Below are a couple of reverbs I’ve been using recently which I really like:
H-Reverb (Waves Audio)
The H-Reverb hybrid reverb from Waves Audio is a go-to reverb plugin for many producers. It is a few years old now but I have used it for a while and I use it on most tracks in some form. It provides a nice warm, rich tone, particularly on vocals.
The plugin has lads of knobs and graphs and so can be quite overwhelming for the beginner but once you know what you are doing you can shape your reverb very precisely and get some awesome sounds!
Twangstrom (U-He)
If you are looking for a nice spring reverb sound to use on guitars then the Twangstrom by U-He is a nice choice. It will give you a classic reverb sound that will remind you of some classic amp reverb.
Eos 2 (Audio Damage)
For a budget reverb plugin, the EOS2 is a great place to start. It is nice and simple to look at and use and comes with plenty of presets.
Pedals
Price
As with all studio equipment you need to set a budget range at the start. Reverb pedals range from pretty cheap to ludicrously expensive! But there are great pedals available at pretty much every price point.
Mono vs Stereo
Some pedals on the market only output the signal in mono whereas some output in stereo. Mono is fine if you are playing live through a single guitar amp as the signal is mono. But when you are recording into a computer directly having a stereo pedal can make a big difference to the recorded sound.
Reverb Types
Now you are familiar with the different types of reverb such as room, plate and spring you are going to want to make sure the pedal you choose has the type you require built in. If you are a blues guitar player you are going to want a nice spring delay and maybe a bit of room delay, but some other features may be surplus to requirements. A lot of pedals will do multiple types of reverb but certain pedals do certain types better than others.
Reverb Pedal Recommendation
Hall of fame 2


I recently bought a Hall of Fame 2 (link to Amazon) after having it recommended to me by several people. There are legendary reverb pedals out there such as the Strymon Big Sky for example that I had always wanted but that will cost you around $500 and I wanted something a little more price friendly for my home studio!
The Hall of Fame 2 from TC electronics has a nice range of different room settings ranging from room to church and it just has a really nice tone to it. I particularly like the ‘shimmer’ effect for creating a dreamy, shoegaze type sound on guitar.
One really interesting feature which I haven’t tried out much yet is something called ‘TonePrint’. TonePrint is an app that allows you to beam effects to your device. So you can select from a list of signature artist reverb types, for example, hold the phone up to your pickups and then the pedal will create that exact tone, pretty crazy!
Choosing your Delay
Delay can be used in a number of ways in your tracks. It can be used in a similar way to reverb to create a feeling of space and to bring dry sounding instruments to life but it can also be used to create very obvious unusual sounds.
Plugins
As with reverb I recommend starting with some plugins if you are in the studio on a budget. They are a great way to mess around and get familiar with how different delay types sound and work.
Delay plugins range from the very simple to the very very complicated. Unless you are really advanced I would start as simple as possible. Firstly it won’t cost you as much money and secondly, in terms of workflow, you will be able to just dial in a delay and keep working rather than spending hours trying to work out what all the features actually do!
The H-Delay (Waves Audio)
Again I’m bigging up Waves plugins again but I do really like them for simple, easy to use plugins that aren’t to expensive. I like the H-Delay in particular for the clear display of the BPM which can be very handy if you want to beat match with the track. The rest of the features are clear, easy to use and it has some nice presets too.

The EchoBoy (Soundtoys)
For a slightly more advanced (and therefore slightly higher price) another great plugin I use a lot is the EchoBoy fro Soundtoys. The thing I use it for most is for trying to emulate the classic sound of a Roland Space Echo. The chorus emulation on it is also really impressive.
It looks good, is easy to use and won’t have you spending hours trying to get a sound.
Pedals
Price
Perhaps even more than with reverb pedals, delay pedals range in price massively. From under $100 to around the $1000 price point! So deciding on a budget again is essential to narrow down what you are looking at.
This will make the search through the hundreds of options slightly less daunting. Be honest with yourself, what features do you actually need for the music you are trying to create? Some pedals will have a huge amount of features but it isn’t worth paying for them if you are only going to use it for slapback delay!
Delay Time
Again, this depends on the type of music you want to create. The maximum delay time on pedals can vary quite a bit. Some pedals have a maximum delay time of just a couple of seconds but some can go up to almost 10 seconds!
Mono vs Stereo
As with reverb, there are both mono and stereo pedal options for delay too. So if you are only going to be playing through a mono output amplifier then mono is fine, but if you are using a stereo output (more than one amp or a speaker system for example) then a stereo pedal can make a big difference to the sound.
Delay Types
As I mentioned in this article there are lots of different types of delay. Some pedals are very simple and come with just one or two delay types but might do them really well. Other pedals come loaded with several which can be really cool, but if you aren’t going to use any of them and you only bought the pedal for a classic slapback blues sound then maybe spending hundreds of dollars on a pedal with lots of different delay types might not be a wise decision.
Analog vs digital?
Ahh the classic question. It’s probably going to be the same answer as for all analog vs delay questions, analog pedals do provide a unique tone and warmth to the sound which is hard to replicate on modern digital delay pedals. Analog pedals aren’t as predictable and easy to program as digital delays though, so if you need a very exact delay time then a digital delay may be a better option.
Delay Pedal Recommendations
Boss DD-7 Digital Delay


This has been my go to delay pedal for almost 10 years. It is a classic and a great place to start without having to spend too much money. You get pretty long delay times of up to 6.4 seconds. A few different modes including modulation and reverse which is a really fun effect to play around with.
It is a nice simple pedal that sounds awesome.
MXR M169 Carbon Copy


If you want to go more traditional and are craving the analog sound then the MXR Carbon Copy analog delay is a great pedal. It does a good job of emulating a ‘tape-echo’ sound, obviously without using any tape and it has a lovely warmth to it that you would expect from an analog pedal.
As with the Boss DD-7 it is simple to use and only has 3 knobs for a pedal that is easy to master straight away.